ADVERTISEMENT
The Complete Guide to Polishing Marble Chips: A Step-by-Step Process
—
ADVERTISEMENT
## 🪨 Step-by-Step: How to Polish Marble Chips
### **Step 1: Clean the Chips Thoroughly**
Before polishing, remove any dirt, oils, or debris.
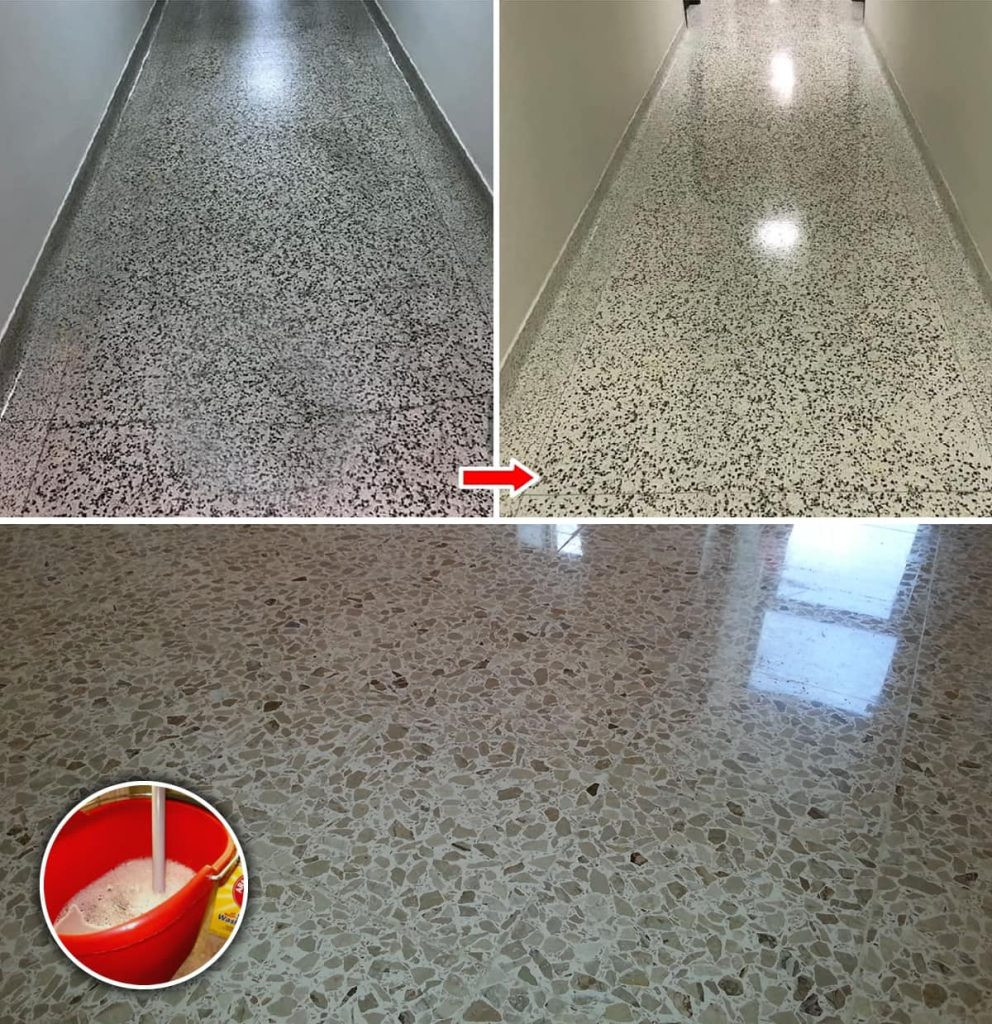
1. Mix warm water with a few drops of **mild dish soap**.
2. Scrub the marble chips gently using a **soft brush**.
3. Rinse with clean water.
4. Let them dry completely on a towel before moving on.
> ✅ *Tip: Don’t use vinegar, lemon, or any acidic cleaners — they can etch marble surfaces.*
—
### **Step 2: Sand the Surface (If Needed)**
If your marble chips are very dull or have surface scratches, sanding helps smooth and prep them for polishing.
1. Start with **400-grit sandpaper**. Gently rub in a circular motion under running water or with a spray bottle to keep dust down.
2. Gradually move to **higher grits** (800 → 1000 → 1500 → 2000), continuing to sand each chip until smooth and slightly shiny.
3. Rinse and dry thoroughly after sanding.
ADVERTISEMENT
> 🧤 *Use gloves to protect your hands during this step, especially with sharp-edged chips.*
—
### **Step 3: Apply Marble Polish or Polishing Powder**
Once clean and smooth, apply a marble-safe polish for that signature glossy finish.
1. Sprinkle a small amount of **marble polishing powder** or cream on the chip.
2. Use a **soft cloth or buffing pad** to rub in small circles for 2–3 minutes per chip.
3. For multiple chips, a **rotary tool or buffer** can save time and provide consistent results.
4. Wipe off any excess polish with a clean cloth.
ADVERTISEMENT
> ✨ *You’ll start to see the marble’s natural shine coming back almost immediately!*
—
### **Step 4: Final Rinse and Buff**
1. Rinse all chips with clean water to remove any residue.
2. Dry completely with a **soft microfiber cloth**.
3. Optional: Apply a **marble sealant** to protect the polish and prevent future staining, especially for outdoor or high-traffic uses.
—
## 📦 Storage and Maintenance Tips
* Store polished chips in a **dry, dust-free** container or display area.
* Wipe occasionally with a soft damp cloth to maintain shine.
* Reapply polish every few months if used outdoors or in high-contact areas.
—
## 🧡 Final Thoughts
Polishing marble chips might seem like a tedious task, but the results speak for themselves — **smooth, glossy stones** that look brand new and instantly elevate any space.
Whether you’re crafting, decorating, or revamping your garden, this step-by-step process will help you preserve the beauty and value of your marble pieces for years to come.
—
Would you like this article turned into a printable PDF guide or visual infographic for DIY use? I’d be happy to help!
ADVERTISEMENT
