ADVERTISEMENT
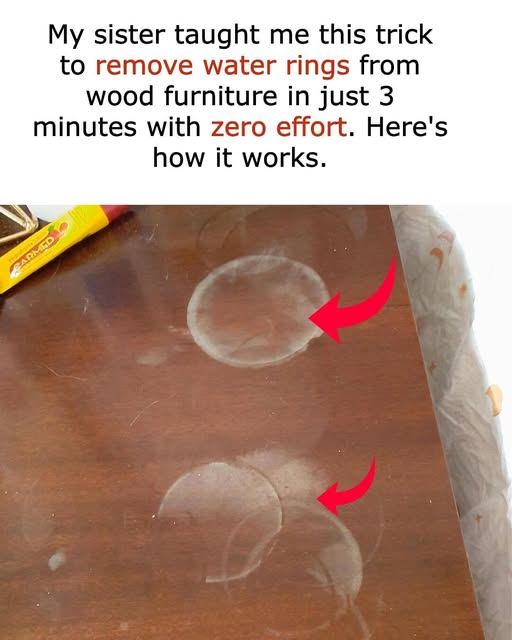
One of the most common and frustrating problems with wood furniture is finding a white water ring left behind by a glass or cup. The good news is that these marks are often easier to remove than you think. This simple guide will show you how to tackle these blemishes and restore your furniture’s beautiful finish.
ADVERTISEMENT
The Quick Fix: Removing Water Rings in Just Minutes
The goal when treating a water ring is to remove the moisture that has become trapped just below the surface of the varnish. You can often do this with a bit of warmth and a few items you already have at home.
-
- The Iron Method: Start by placing a clean, dry cotton cloth (like a t-shirt or towel) over the water mark. Make sure your iron is set to a low heat with no steam. Gently press the iron onto the cloth for just a few seconds. Lift the iron and check the spot. Repeat this process until the ring disappears. This method works by gently heating the area and allowing the trapped moisture to evaporate.
- The Mayonnaise or Petroleum Jelly Method: For this technique, you will need a small amount of mayonnaise or petroleum jelly. Apply a generous layer directly to the water ring. The oils in these substances can help to displace the moisture in the varnish. Let it sit for a few hours, or even overnight, before wiping it off. You can then polish the area with a soft cloth to restore the shine.
A Deeper Look into Varnished Wood
If your project involves more than just a quick fix for a water ring, it’s important to understand how to properly work with varnished surfaces. The general tips below will help you prepare your furniture for a variety of projects, from painting to refinishing. This guidance is especially helpful if you’re wondering, “Are you asking about sanding, staining, or painting wood that has varnish on it?”
Surface Preparation
Varnish creates a hard, glossy, and non-porous surface, which can make it difficult for new coatings, adhesives, or finishes to stick properly. Without proper preparation, a new layer of paint or stain could easily peel or flake off. The key to a successful project is to create a better bonding surface. As a general rule, you should “Lightly sand the surface with fine-grit sandpaper (e.g., 220 grit) to scuff up the varnish and create a better bonding surface. Wipe away dust with a tack cloth or damp rag.” This simple step will make a big difference in how well your new finish holds up.
ADVERTISEMENT
