ADVERTISEMENT
### 2. **Sterilize the Jar**
ADVERTISEMENT
Boil your jar and lid in water for 5–10 minutes, or wash them in hot soapy water and rinse well. This helps prevent spoilage and extends shelf life.
### 3. **Make the Brine**
In a small saucepan, combine vinegar, water, salt, sugar, and optional spices. Bring the mixture to a boil, then reduce heat and simmer for 2–3 minutes until the salt and sugar dissolve.
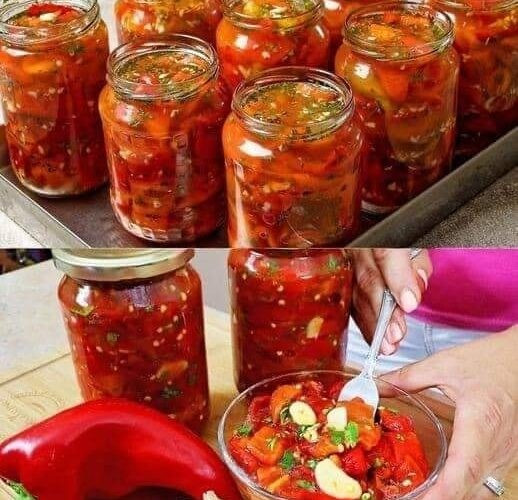
### 4. **Pack the Jar**
Place garlic cloves at the bottom of the jar. Tightly pack the sliced peppers on top. You want the jar to be full but not overstuffed.
### 5. **Pour the Brine**
Carefully pour the hot brine over the peppers, making sure they’re fully submerged. Tap the jar gently to release any air bubbles. Add more brine if needed.
### 6. **Seal and Cool**
Screw the lid on tightly. Let the jar cool to room temperature, then refrigerate.
ADVERTISEMENT
### 7. **Let Them Pickle**
While you can start tasting them after 24 hours, they develop the best flavor after about **5–7 days** in the fridge.
—
## 🧊 Storage Tips
* These are **refrigerator pickles**, not shelf-stable. Always keep them in the fridge.
* They’ll stay fresh for up to **2 months**—if they last that long!
ADVERTISEMENT
—
## 🍽 Serving Ideas
* Add to burgers, hot dogs, or sandwiches
* Toss into salads or pasta dishes
* Serve with grilled meats or tacos
* Chop and mix into salsa or relish
—
## Final Thoughts
Once you taste your homemade garlic pickled peppers, store-bought ones just won’t compare. The burst of heat, the zing of vinegar, and the richness of garlic come together in every bite to create a mouthwatering condiment you’ll want to put on everything.
Try a batch this weekend—you might just find yourself pickling every pepper you can get your hands on.
—
Would you like this turned into a printable recipe card or visual guide for social media or a blog?
ADVERTISEMENT
