ADVERTISEMENT
—
ADVERTISEMENT
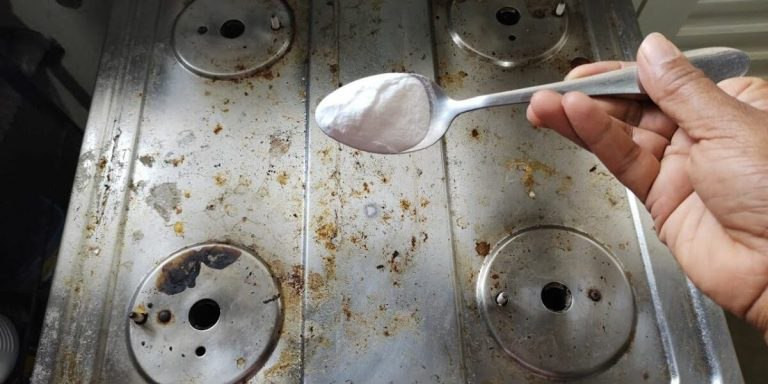
### 🧂 **Step 3: Sprinkle Baking Soda**
After soaking, take the parts out and sprinkle baking soda generously on all greasy or stained areas. The baking soda reacts with the vinegar, creating a natural fizzing action that loosens dirt without scrubbing.
—
### ⏳ **Step 4: Let It Sit**
Leave the baking soda on for about **10-15 minutes**. During this time, it will break down grease and food residue.
—
### 🧽 **Step 5: Rinse and Wipe Clean**
Use a soft cloth or a toothbrush to gently wipe away the residue. Because of the soak and fizzing, the dirt should come off easily with just light wiping—no scrubbing required!
If you encounter tiny clogged holes in the burner, use a toothpick to carefully clear them without damaging the part.
ADVERTISEMENT
—
### 🧼 **Step 6: Dry and Reassemble**
After cleaning, rinse all parts with clean water and dry them thoroughly. Make sure everything is completely dry before putting the burner back together.
—
### 🔥 **Bonus Tip: Keep Your Burners Cleaner, Longer**
ADVERTISEMENT
* Wipe your burners after each use to prevent buildup.
* Use a drip pan to catch spills and crumbs.
* Clean spills promptly to avoid hardened grime.
—
### 🧠 **Why This Works**
The magic combo of vinegar and baking soda cuts through grease by breaking it down chemically — no elbow grease needed! Soaking loosens stubborn residues, while the gentle fizzing action helps lift grime without damaging delicate burner parts.
—
### ✅ **Final Thought**
Cleaning your gas burner doesn’t have to be a frustrating, scrubbing battle. With this easy vinegar and baking soda method, you can enjoy a clean, efficient stove — without the mess or the muscle.
—
**Want more quick and easy kitchen cleaning hacks? Just ask! I’m here to help you keep your home sparkling with minimal effort.**
ADVERTISEMENT
