ADVERTISEMENT
### Step 3: **Let It Sit**
ADVERTISEMENT
Let the mixture sit undisturbed for 5–10 minutes to fully separate.
### Step 4: **Strain the Curds**
Place the cheesecloth-lined colander over a large bowl. Gently pour the curdled milk into the colander to separate the curds from the whey.
### Step 5: **Season and Press (Optional)**
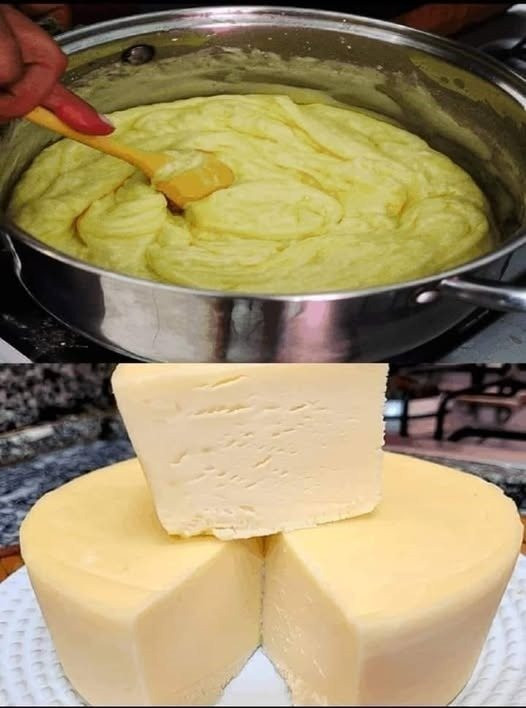
Sprinkle with salt if desired. For a firmer cheese, gather the cloth and press it under a heavy object (like a pot filled with water) for 30–60 minutes. For a soft cheese, just let it drain without pressing.
### Step 6: **Cool and Store**
Unwrap your cheese, shape it if needed, and store it in the refrigerator for up to 4–5 days. Use it in salads, sandwiches, or curries — or just enjoy it as is!
—
## 🧂 Variations to Try
ADVERTISEMENT
* **Herbed Cheese**: Mix in chopped fresh herbs like chives, dill, or basil.
* **Spiced Cheese**: Add cracked pepper, cumin seeds, or chili flakes for a flavor kick.
* **Sweet Cheese**: Blend in honey and cinnamon for a dessert-style spread.
—
## 💡 Why Make Cheese at Home?
* ✅ **No preservatives** or additives
* ✅ **Customize the flavor and texture**
* ✅ Great for people with **dietary sensitivities**
* ✅ **Fun and educational** – great for cooking with kids or beginners
* ✅ **Zero-waste bonus**: Use leftover whey in smoothies, soups, or bread!
—
ADVERTISEMENT
## 🥗 Serving Ideas
* Crumble over salads or roasted veggies
* Slice and pan-fry for a crispy golden edge
* Stir into pasta or risotto for a creamy boost
* Spread on crackers with a drizzle of honey
—
## 🧀 Final Thoughts
Homemade cheese is more than just a kitchen experiment — it’s a return to simple, wholesome cooking. In just a few easy steps, you can transform ordinary milk into something truly special. Once you try it, you may never go back to store-bought again!
So grab some milk, a little vinegar, and give it a try — **your fridge and tastebuds will thank you.**
—
Would you like a printable recipe card or a version adapted for goat’s or plant-based milk? Let me know!
ADVERTISEMENT
