ADVERTISEMENT
### For the Marshmallow Frosting (Swiss Meringue Style):
ADVERTISEMENT
* 4 large egg whites
* 1 cup granulated sugar
* ¼ tsp cream of tartar (optional, for stability)
* 1 tsp vanilla extract
### For the Chocolate Coating:
* 1½ cups semi-sweet chocolate chips or chopped chocolate
* 2 tbsp coconut oil or vegetable oil (for shine and smooth dipping)
—
## 👩🍳 Instructions
### Step 1: Make the Cupcakes
1. **Preheat oven** to 350°F (175°C) and line a muffin tin with cupcake liners.
2. In a large bowl, whisk together flour, cocoa, baking soda, baking powder, and salt.
3. In another bowl, combine sugar, oil, eggs, and vanilla. Mix until smooth.
4. Add half the dry ingredients, then the buttermilk, followed by the rest of the dry mix. Stir in hot water or coffee last.
5. Fill liners about ⅔ full and bake for 18–20 minutes, or until a toothpick comes out clean.
6. Cool completely before frosting.
—
### Step 2: Make the Marshmallow Frosting
ADVERTISEMENT
1. Combine egg whites, sugar, and cream of tartar in a heatproof bowl (or stand mixer bowl).
2. Set over a pot of **simmering water (double boiler method)** and whisk constantly until the sugar is fully dissolved and the mixture is warm to the touch (about 160°F).
3. Remove from heat. Using a hand or stand mixer, **whip on high** for 6–8 minutes until stiff, glossy peaks form.
4. Add vanilla and mix briefly to combine.
5. Transfer to a piping bag fitted with a **large round tip**.
—
### Step 3: Pipe the Swirl
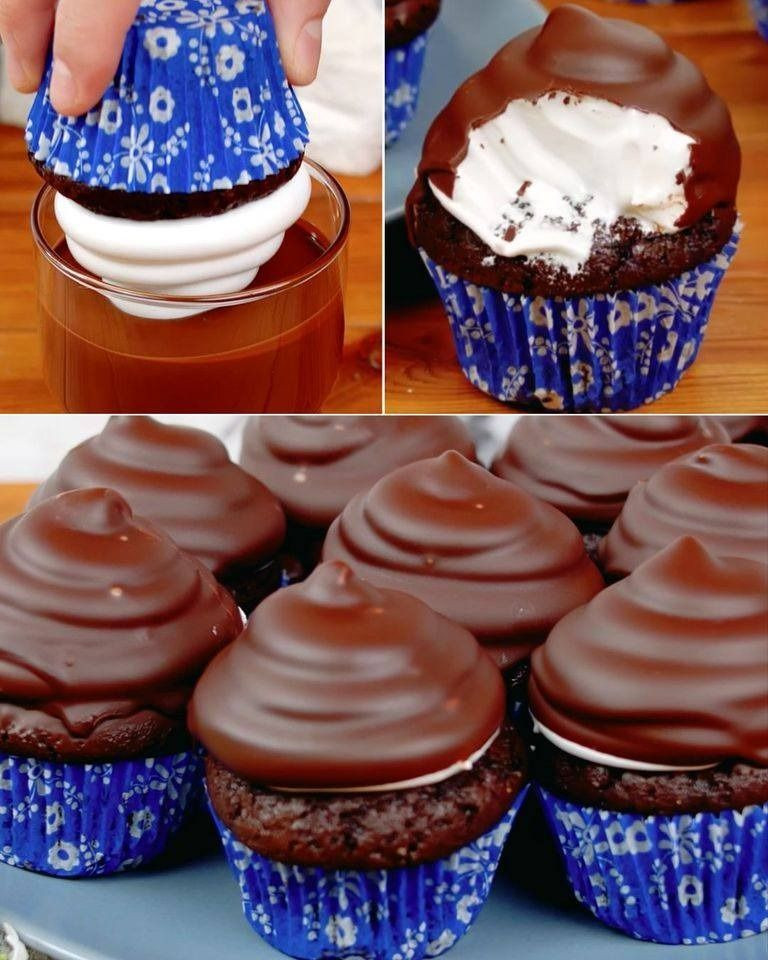
1. Pipe tall swirls of frosting onto each cupcake. Don’t be shy — the taller, the better!
2. Place the frosted cupcakes in the **freezer** for 20–30 minutes to firm up before dipping.
—
ADVERTISEMENT
### Step 4: Dip in Chocolate
1. Melt chocolate and oil together in a microwave-safe bowl or double boiler until smooth.
2. Let the mixture cool slightly — it should be warm and pourable, **but not hot**, so it doesn’t melt the frosting.
3. Remove cupcakes from the freezer and **dip each one upside down** into the chocolate, covering the entire swirl.
4. Let excess drip off, then flip and place on a tray to set.
5. Chill briefly to firm the shell.
—
## 🍫 Tips for Success
* **Use a tall piping bag and steady hand** for the iconic hi-hat swirl.
* Make sure frosting is cold before dipping — this is key to holding its shape.
* Coconut oil gives the chocolate shell a smoother texture and shine.
* Store in the refrigerator but **serve at room temperature** for the best texture.
—
## 🎉 Final Thoughts
Hi-Hat Cupcakes are the ultimate “wow” dessert — dramatic, delicious, and irresistibly fun to eat. Whether you’re baking for a party, a birthday, or just a weekend treat, these cupcakes deliver in both taste and presentation.
Yes, they take a few steps — but the payoff? Totally worth it.
So roll up your sleeves, melt that chocolate, and show off your sweet skills — one hi-hat cupcake at a time! 🎩🧁✨
—
Would you like a printable version of this recipe or step-by-step photo instructions?
ADVERTISEMENT
